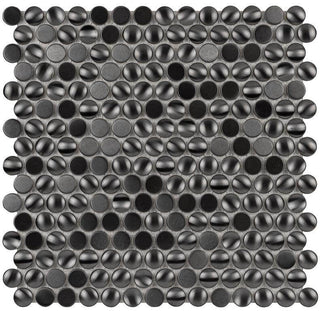
3D Brushed Gun Metal Dimes Mosaic Tile
Transform your space with the modern sophistication of the 3D Brushed Gun Metal Dimes Mosaic. This mosaic tile features a unique three-dimensional design with brushed gun metal finish, creating a stunning visual effect that adds depth and texture to any surface. The mosaic pattern consists of small dimes arranged in a three-dimensional layout, offering a contemporary and dynamic aesthetic. Perfect for accent walls, backsplashes, or shower surrounds, this mosaic tile brings a touch of industrial chic to your interior design.
| Color | Blackish grey |
| Material | Metal |
| Sold | Sold by sheet |
| Ideal For | Floors and walls |
| Style |
Classic and versatile |
Installation Tips:
- Ensure the installation surface is clean, dry, and even.
- Use tile spacers to maintain consistent spacing and ensure straight lines.
- Apply a high-quality tile adhesive for a secure bond.
- Grout and seal the tiles for a professional finish and added durability.
Maintenance & Care:
- Clean regularly with a soft cloth or sponge and a pH-neutral cleaner.
- Avoid harsh chemicals and abrasive scrubbers to prevent scratching.
- Seal the grout periodically to maintain its integrity and appearance.

